|
Title
|
|
 |
1 |
|
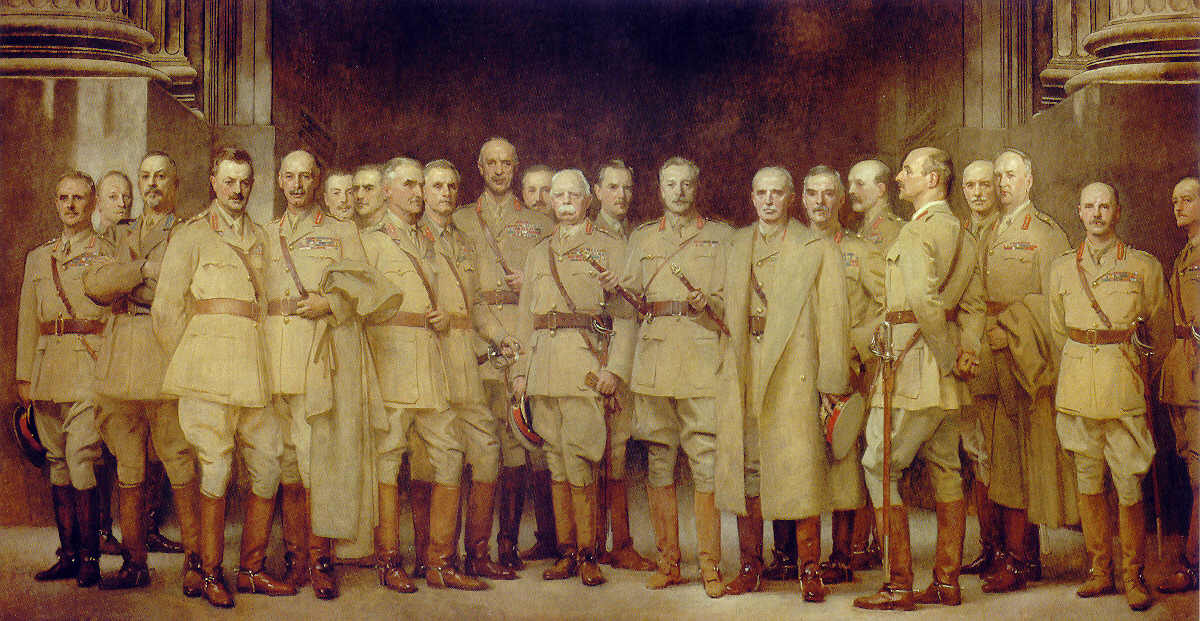
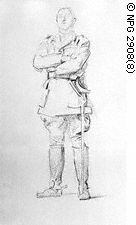
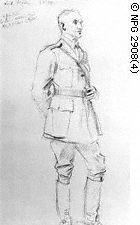
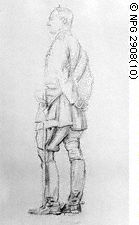
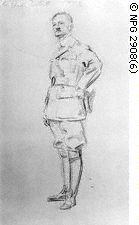
William
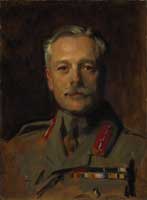
Riddell Birdwood, 1st Baron Birdwood (1865-1951), Field Marshal |
 |
William
Riddell Birdwood, 1st Baron Birdwood,
(1865-1951),
Field-Marshal
c.
1922
National
Portrait Gallery, London
Medium: chalk
23 1/4 in. x
19 in. (591
mm x 483 mm)
(Thumbnail
is full size image)
|
|
During
WW1 he was a General Officer Commanding Australian and New Zealand Army
Corps, World War I 1914-1918; Commander-in-Chief Mediterranean
Expeditionary
Force and Commander, Dardanelles Army, Gallipoli 1915-1916; General
Officer
Commanding Australian Imperial Force 1915-1918; France 1916-1918;
Commander,
5 Army, France 1918-1919
Service
biography
Commissioned
4 Bn Royal Scots Fusiliers 1883; 12 Lancers 1885; 11 Bengal Lancers
1887;
Hazara Campaign 1891; Isazai 1892; Adjutant, Viceroy's Bodyguard, India
1893; North West Frontier, India and Tirah campaign 1897-1898; South
African
War 1899-1902; Deputy Assistant Adjutant General, South Africa 1900;
Military
Secretary to Commander-in-Chief (Gen Horatio Herbert Kitchener, 1st
Viscount
Kitchener of Khartoum), South Africa 1902; Assistant Military Secretary
and interpreter to Commander-in-Chief, India 1902; Assistant Adjutant
General,
Headquarters India 1904; Military Secretary to Commander-in-Chief (Gen
Horatio Herbert Kitchener, 1st Vicount Kitchener of Khartoum), India
1905;
Mohmand expedition 1908; Bde Commander, Kohat Bde, North West Frontier,
India 1909; Quartermaster General, India 1912; Secretary to Government
of India, Army Department and Member of the Governor General's
Legislative
Council 1912-1914; General Officer Commanding Australian and New
Zealand
Army Corps, World War I 1914-1918; Commander-in-Chief Mediterranean
Expeditionary
Force and Commander, Dardanelles Army, Gallipoli 1915-1916; General
Officer
Commanding Australian Imperial Force 1915-1918; France 1916-1918;
Commander,
5 Army, France 1918-1919; General Officer Commanding-in-Chief Northern
Army, India 1920-1924; Commander-in-Chief, India 1925-1930; Member of
the
Executive Council of the Governor Gen and of the Council of State of
India
1925
(King's
College London)
|
|
|
 |
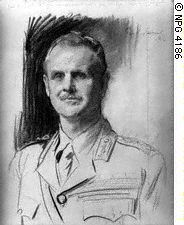
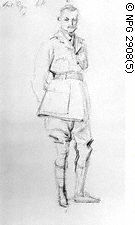
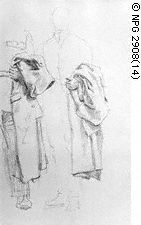
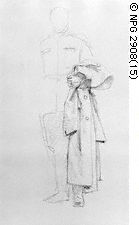
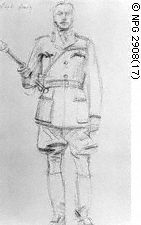
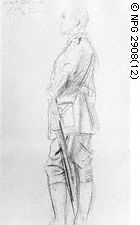
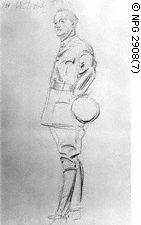
William
Riddell Birdwood, 1st Baron Birdwood,
(1865-1951),
Field-Marshal.
c.
1922
National
Portrait Gallery, London
Medium: pencil
14 in. x 8 5/8
in. (356
mm x 219 mm)
(Thumbnail
is full size image)
|
|
|
|
|
2 |
|
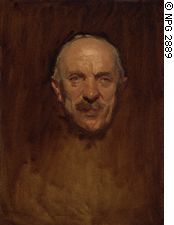
Jan
Christian Smuts (1870-1950), Field Marshal and South Arfican
Statesman |
 |
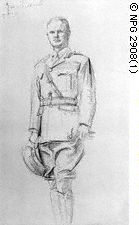
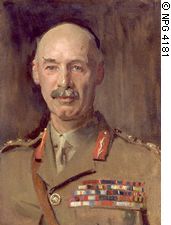
Jan Christian Smuts
C. 1919-1922
(Statesman
and Field Marshal)
Oil on canvas
31 3/4 in. x
25 3/4 in.
(806 mm x 654 mm) |
| |
During
World War I Smuts
commanded British imperial forces in East Africa (1916-17), represented
South Africa in Britain's Imperial War Cabinet (1917-18), and helped
plan
the organization of the League of Nations. Was prime minister of South
Africa (1919-24)
(encarta.msn.com) |
|
|
|
|
3 |
|
Louis
Botha (1862–1919), South African Statemen and Soldier |
 |
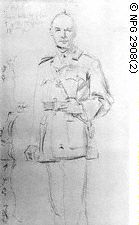
Louis
Botha
c.
1922
National
Portrait Gallery, London
Medium: pencil
14 in. x 8 5/8
in. (356
mm x 219 mm)
South
African Statesman
(Thumbnail
is full size image)
|
|
A
Boer (Afrikaner), he participated in the founding (1884) of the New
Republic,
which joined (1888) the Transvaal. With little military
experience,
he brilliantly commanded Boer troops against British in the Boer War of
South Africa. After the war, however, he favored reconciliation with
the
British and was instramental in getting South African troops on the
side
of Britian at the Start of WW1 |
|
|
|
|
4 |
|
Julian
Byng, 1st Viscount Byng of Vim (1862-1935), British general. |
 |
Julian Byng, 1st Viscount
Byng of Vimy
c.
1922
National
Portrait Gallery, London
Medium: pencil
14 in. x 8 5/8
in. (356
mm x 219 mm)
(Thumbnail
is full size image)
(See Philip
Alexius de Laszlo drawing and painting)
|
|
He
served in India and South Africa and had several commands in World War
I. In Apr., 1917, Canadian troops under his command took Vimy Ridge, in
N France. For his distinguished services he was made a baron and, in
1926,
a viscount. He was governor-general of Canada from 1921 to 1926. |
|
|
|
|
5 |
|
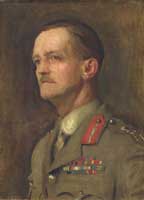
Henry
Seymour Rawlinson, 1st Baron Rawlinson of Trent (1864-1925), General
and
Commander-in-Chief of Army in India. |
 |
Henry
Seymour Rawlinson, 1st Baron Rawlinson of Trent
c.
1922
National
Portrait Gallery, London
Medium: oil on
canvas
22 in. x 16
in. (55.9 x
40.6 cm)
(Thumbnail
is full size image)
|
|
1864–1925,
British general.
In World War I he commanded (1914–15) the IV Corps and became (1916)
lieutenant
general in command of the British 4th Army. In 1918 he was a member of
the Supreme War Council at Versailles, and later, returning to his
previous
command, he achieved notable success in piercing the German line in a
breakthrough
between St. Quentin and Cambrai (Aug.–Nov., 1918).
Son of Sir
Henry Creswicke
Rawlinson. He served in the Myanmar expedition of 1886–87, in the Sudan
campaign (1898), and in the South African War (1899–1902). After the
war,
he was raised to the peerage in 1919 and commanded the British forces
in
India from 1920 until his death. Under him high army posts were
assigned
to Indians for the first time, and the northwest frontier was pacified.
(Columbia
Encyclopedia, Sixth Edition)
|
|
|
 |
Henry
Seymour Rawlinson, Baron Rawlinson
c.
1922
National
Portrait Gallery, London
Medium: pencil
14 in. x 8 5/8
in. (356
mm x 219 mm)
(Thumbnail
is full size image)
|
|
|
 |
Henry
Seymour Rawlinson, Baron Rawlinson
c.
1922
National
Portrait Gallery, London
Medium: pencil
14 in. x 8 5/8
in. (356
mm x 219 mm)
(Thumbnail
is full size image)
|
|
|
 |
Henry
Seymour Rawlinson, Baron Rawlinson
c.
1922
National
Portrait Gallery, London
Medium: pencil
14 in. x 8 5/8
in. (356
mm x 219 mm)
(Thumbnail
is full size image)
|
|
|
|
|
6 |
|
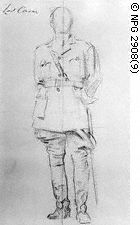
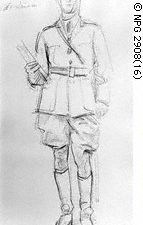
Sir
Henry Timson Lukin (1860-1925), Major-General |
|
Sir Henry
Timson Lukin (1860-1925)
served with South African forces during the First World War, leading
his
country's brigade at Delville Wood in 1916 wherein during Sir
Douglas Haig's wide Somme Offensive of 15 July 1916, of the 433 men
under his command at Delville only 143 emerged five days later..
Lukin
gained wide popularity
with his troops, recognising as they did his very real concern for
their
welfare under difficult circumstances. He was also perfectly
willing
to share their front-line dangers, despite having been gassed.
Promotion
arrived in December
1916 in the form of command of the 9th (Scottish) Division, considered
one of the best Allied divisions serving in France. He
consequently
saw action at both Arras and during the Third Battle of Ypres. He
was however superseded in March 1918.
(FirstWorldWar.com)
|
|
|
|
|
7 |
|
Sir
John Monash (1865-1931), Australian general |
|
Sent with
the 4th Brigade
(1,000 men) to Gallipoli in 1915 where he made a name for himself for
his
independent decisions in a bungled campaign. But even he could not save
his brigade from the futile August/September offensives against the
Turks
in that year.
By June
1916 he was in France,
with the rank of major-general and in charge of the new 3rd Division
which
he trained mercilessly. Once again he used raiding techniques frowned
on
by the British High Command, but they were impressed by his detail and
precision in a war that was going very badly. By 1917 he was made corps
commander. He trained his troops to a high degree of efficiency and
coordinated
the use of infantry, air-power, artillery and tanks.
It was at
the Battle of Hamel
Hill on 4-July-1918 that his tactics won a well needed victory for the
Allies. On 12-Aug-1918, Monash was knighted on the field by King George
V. Thereafter the A.I.F. smashed its way through France, used as shock
troops in an amazing series of victories against the Germans - at
Chignes,
Mont St Quentin, Peronne and Hargicourt and breaking the Hindenburg
Line.
(www.worldwar1.com)
|
|
|
|
|
8 |
|
Henry
Sinclair Horne, Baron Horne (1861-1929), General |
 |
Henry
Sinclair Horne, Baron Horne
c.
1922
National
Portrait Gallery, London
Medium: pencil
14 in. x 8 5/8
in. (356
mm x 219 mm)
(Thumbnail
is full size image)
|
|
Commanded
the British First
Army from September 1916 until the end of the First World War.
In June of
1916 Horne was
given charge of XV Corps in January 1916. It played a prominent (and
initially
highly successful) role in the Battle of the Somme in July 1916, where
his innovative approach to the 'creeping barrage' won him many plaudits
(although XV Corps also played a role in the disastrous attempt on High
Wood).
Horne
demonstrated an ongoing
enthusiasm for the development of technical and tactical improvements
within
artillery. Knighted in 1916 his next appointment brought him an
army
level command - First Army in September 1916 - which he retained until
the armistice. Horne was the sole artillery officer of the war to
be given command of a British field army.
(www.firstworldwar.com)
|
|
|
|
|
9 |
|
George
Francis Milne, 1st Baron Milne (1866-1948), Field Marshal |
|
|
|
|
10 |
|
Sir
Henry Hughes Wilson, Bt (1864-1922), Field Marshal |
 |
Sir
Henry Hughes Wilson, Bt
(1864-1922),
Field-Marshal
c.
1922
National
Portrait Gallery, London
Medium: oil on
canvas
21 1/2 in. x
15 1/2 in.
(546 mm x 394 mm)
(Thumbnail
is full size image)
|
|
|
|
Sir
Henry Hughes Wilson, Bt
(1864-1922),
Field-Marshal
c.
1922
National
Portrait Gallery, London
Medium: pencil
14 in. x 8 5/8
in. (356
mm x 219 mm)
(Thumbnail
is full size image)
|
|
|
|
|
11 |
|
Sir
Andrew Hamilton Russell (1868-1960), Major-General |
|
|
|
|
|
|
12 |
|
Herbert
Plumer, 1st Viscount Plumer (1857-1932), Field Marshal |
|
|
|
|
|
|
13 |
|
Sir
John Steven Cowans (1862-1921), General |
 |
Sketch
for General Cowans
1920
Adelson
Galleries
Oil on canvas
16 3/4 x 20
3/4 in. |
|
|
|
|
|
|
14 |
|
Douglas
Haig, 1st Earl Haig (1861-1928), Field Marshal |
 |
Douglas
Haig, 1st Earl Haig
1922
National Gallery of Scotland, Edinburgh
Oil on canvas
56 x 41 cm
Purchased
1925, Accession no.PG 1010
|
|
The most
controversial of
the war generals
Served
under Sir
John French during the Bore War. By the close of 1915 it was clear
that French (his superior) was ill-suited to the nature of the
campaign,
and Haig was appointed the new Commander in Chief of the BEF on 10
December
1915.
Much of the
nature of the
fighting taking place in the First World War was alien to Haig, a
cavalry
man through and through. He did not rate very highly the war's
new
weaponry. "The machine gun is a much over rated weapon," he said
in 1915; he made similar remarks over the use of the tank.
The Somme
offensive with
which Haig's name is most often associated (along with Third Ypres,
also
known as Passchendaele), began on 1 July 1916. Haig was pressured
to bring forward the original attack date from August so as to relieve
the heavy casualties experienced by the French at Verdun, which the
Germans
had been bombarding since early in the year.
It was
thought that by committing
significant British forces on the Somme, the Germans would necessarily
divert troops from Verdun, thereby taking the sting out of the
offensive.
The first
day of the Battle
of the Somme saw the British Army suffer the highest number of
casualties
in its history: 60,000. [see Sir Henry
Timson
Lukin]
Whether the attack was a success or not remains an area of controversy:
however most historians agree that the cost in human terms was too high
for relatively little gain. In any event the offensive was called
off by Haig on 18 November 1916, technically a British victory.
1917 saw
the campaign at
Third Ypres from July to November - Passchendaele - which ultimately
ground
down German resistance, although at heavy cost in British manpower.
In 1918
Haig oversaw the
successful British advances on the Western Front which led to victory
for
the Allies in November.
(FirstWorldWar.com)
After the
war, Haig was reponsible for uniting ex-servicemen in the Royal British
Legion.
|
|
|
 |
Douglas
Haig, 1st Earl Haig
c.
1922
National
Portrait Gallery, London
Medium:
pencil
14
in. x 8 5/8 in. (35.6 x 21.9 cm)
(Thumbnail
is full size image)
|
|
|
|
|
15 |
|
John
French, 1st Earl of Ypres (1852-1925), Field Marshal |
 |
John
French, 1st Earl of Ypres
c.
1922
National
Portrait Gallery, London
Medium: oil on
canvas
21 1/2 in. x
15 1/2 in.
(546 mm x 394 mm)
(Thumbnail
is full size image)
|
|
After
being appointed Chief
of Staff of the British Army in 1911, French was given command of the
British
Expeditionary Force (BEF) which was deployed to Europe in the opening
days
of the war, August 1914.
French was
temperamentally
unsuited to command of the BEF, becoming so depressed at the prospects
of success following the Mons campaign that his chief concern came to
be
the safe welfare of his troops, to the cost of his French allies.
It required an emergency visit from Kitchener, the Secretary of War, in
September 1914 to stiffen French's resolve.
Once the
war of manoeuvre
ended French's mood switched to one of over-optimism, until by Autumn
1915
he was once again reluctant to co-operate with the French and had to be
urged into action.
In the
campaigning which
followed, his incapability again became evident, coupled with poor
judgement,
which compelled his replacement in December 1915 by his then deputy, Douglas
Haig.
Relieved of
his command French
served as Commander of the British Home Forces from 1915-18
(www.firstworldwar.com)
|
|
|
 |
John
French, 1st Earl of Ypres
(1852-1925),
Field-Marshal.
c.
1922
National
Portrait Gallery, London
Medium: pencil
14 in. x 8 5/8
in. (356
mm x 219 mm)
(Thumbnail
is full size image)
|
|
|
16 |
|
Sir
William Robert Robertson, 1st Bt (1860-1933), Field Marshal |
|
|
|
|
|
|
17 |
|
Sir
Frederick Stanley Maude (1864-1917), Lieutenant-General |
|
|
|
|
|
|
18 |
|
Edmund
Henry Hynman Allenby, 1st Viscount Allenby (1861-1936), Field Marshal |
 |
Edmund
Allenby, 1st Viscount Allenby
c.
1922
National
Portrait Gallery, London
Medium: pencil
14 in. x 8 5/8
in. (356
mm x 219 mm)
(Thumbnail
is full size image)
|
|
|
 |
Edmund
Allenby, 1st Viscount Allenby
c.
1922
National
Portrait Gallery, London
Medium: pencil
14 in. x 8 5/8
in. (356
mm x 219 mm)
(Thumbnail
is full size image)
|
|
|
19 |
|
Sir
William Marshall (1865-1939), Lieutenant-General |
|
|
|
|
|
|
20 |
|
Sir
Arthur William Currie (1875-1933), Canadian general |
|
|
|
|
|
|
21 |
|
Frederick
Lambart, 10th Earl of Cavan (1865-1946), Field Marshal |
 |
Frederick
Lambart, 10th Earl of Cavan
c.
1922
National
Portrait Gallery, London
Medium: pencil
14 in. x 8 5/8
in. (356
mm x 219 mm)
(Thumbnail
is full size image)
|
|
Was
brought back from retirement
in 1914 and rose to become one of the British Army's more successful
commanders
during the First World War.
January,
1916, Cavan was
placed at the head of XIV Corps, a command he held until March 1918,
during
which time he established a deserved reputation as perhaps the best
corps
commander on the Western Front.
It was with
XIV Corps that
Cavan was despatched to the Italian Front in the wake of the Caporetto
fiasco in November 1917. The following March Cavan was formally
appointed
Commander-in-Chief of British forces on the Italian Front.
It was in
this capacity that
Cavan led the Italian Tenth Army which struck a decisive bow at the
Battle
of Vittorio Veneto, the action which sounded the final death blow of
the
Austro-Hungarian army towards the close of the war.
(www.firstworldwar.com)
|
 |
Frederick
Lambart, 10th Earl of Cavan
c.
1922
National
Portrait Gallery, London
Medium: pencil
14 in. x 8 5/8
in. (356
mm x 219 mm)
(Thumbnail
is full size image)
|
|
|
|
|
22 |
|
Sir
Charles Macpherson Dobell (1869-1954), General |
 |
Sir
Charles
Macpherson Dobell
1919
Private
collection
Oil on canvas
22 x 16 in. (55.8 x 40.6 cm.)
signed 'John S
Sargent'
(upper centre) and dated '1919' (upper right) |
|
Sir Charles Macpherson Dobell (1869-1954), The Royal Welch
Fusileers, served in field command positions in Africa and Palestine
during World War One, and he was knighted and promoted to
Lieutenant-General following his endeavours as commander of an
Anglo-French force tasked with the capture of Cameroon. He was
mentioned in dispatches nine times.
(Christies) |
 |
Sir
Charles Macpherson Dobell
(1869-1954),
General
c.
1922
National
Portrait Gallery, London
Medium: pencil
14 in. x 8 1/2
in. (356
mm x 216 mm)
(Thumbnail
is full size image)
|
|
|
 |
Sir
Charles Macpherson Dobell
(1869-1954),
General
c.
1922
National
Portrait Gallery, London
Medium: pencil
14 in. x 8 5/8
in. (356
mm x 219 mm)
(Thumbnail
is full size image)
|
|
|
 |
Unknown
sitter
c.
1922
National
Portrait Gallery, London
Medium: pencil
14 in. x 8 5/8
in. (356
mm x 219 mm)
(Thumbnail
is full size image)
|
|
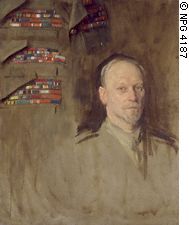
| General
Officers of
the Great War
The large group
portrait was difficult
for Sargent. It was part of the commission given by the Ministry of
Information
(which to me sort of sounds like an Orwelian 1984 title). They
had
hired Sargent and Henry Tonks and others do do paintings of the war
with
Sargent's Gassed being the central piece. This painting had
been
part of a deal he had agreed to which was sort of thrust upon him --
and
he seemed to hated every minute of it.
The war had been
over now for while
and he had put off the portrait as long as he could. Once he got into
it,
he found it as dreadful and uninspiring as he had anticipated. He
did studies of each individual, and then often a formal oil portrait
study
of the head.
Once he started the
final portrait
he did the bodies first and then painted the heads. Although the image
of the finished oil here does not show it well, the end result is about
as uninspired as Sargent felt. It looks like what it really is --
a group of individual portraits artificially stuck together on the same
canvas. It is as if
he
had forgotten everything he had learned from Frans
Hals some forty years previous.
This had never been
Sargent's strong
suit. He was a modern painter in the sense that he painted what he saw
and was not good at contrived settings, with the possible exception of
the Library Murals, and the other Boston decorations he did -- but then
one could easily argue that these suffer from the same sort of
weakness.
From: National
Portrait Gallery
Sargent, who
initially declined the
commission, began work on the military group portrait on his return
from
America in August 1920. He found the commission particularly difficult,
writing to Sir James Guthrie (who was working on the politicians
portrait)
in September of that year: 'But I am still merely collecting material
and
have not yet evolved any scheme of the picture as a whole. I am
handicapped
by the idea that they never could have been altogether in any sort of
interesting
background and reduced to painting them all standing up in a vacuum'.
Certainly,
this painting does not have the characteristic brilliance of Sargent's
other work and was described by a former director of the National
Portrait
Gallery as 'Still Life with Boots'.
Notes:
|
|